
RGB LED Matrix Panel


Bring a little bit of Times Square into your home with these sweet RGB LED matrix panels.
These HUB75 style panels are normally used to make video walls, you can sometimes see them on the sides of buses and bus stops displaying animations or short video clips. They have bright RGB LEDs arranged in a 32x32, 32x64 or 64x64 grid on the front. On the back there is a PCB with a set of dual IDC connectors (one input, one output) and 12 16-bit latches that allow you to drive the display with a 1:16 scan rate.
These panels require 13 digital pins (6 bit data, 7 bit control) and a good 5V supply, up to 4A per panel). They are 'chainable' if you connect one output to the next input - you will need a microcontroller with a suitably high speed processor and enough RAM plus a software library that supports this.
These displays are designed to be driven by FPGAs or other high speed processors: they do not have built in PWM control of any kind. Instead, you're supposed to redraw the screen over and over to 'manually' PWM the whole thing. On a 16 MHz Arduino, it's possible to squeeze 12-bit color (4096 colors) with 40% CPU usage but they will do best powered by an FPGA or other high speed multi-core controller (like a recent Raspberry Pi or Feather). They are pre-white balanced with nice uniformity so if you turn on all the LEDs it's not a particularly tinted white.
Here are some nice, tidy ways to connect up and drive your LED matrices:
- Interstate 75 W (RP2350-based all-in-one controller)
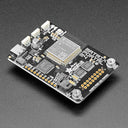
- RGB Matrix Shield (for Arduino and compatibles)
- RGB Matrix Bonnet or RGB Matrix HAT (for Raspberry Pi)
- RGB Matrix Featherwing (for M0, M4 and RP2040 Feathers or nRF52840 Feathers)
...scroll down for tutorial links!
Includes
- LED panel
- Power cable (with fork connectors suitable for connecting to a screw terminal)
- IDC data cable
- Four magnetic feet with screw threads
COM-B021 includes
Our new 128x64 panels come in packs of two! Here's what you get with those:
- 2x 128x64 LED panel
- Double ended power cable (with ring connectors suitable for connecting to a screw terminal)
- Long IDC data cable
- Eight magnetic feet with screw threads
Specifications
| COM-B006 | COM-B007 | COM-B013 | COM-B014 | COM-B021 | |
| Dimensions (mm, L x W x H) | 192 x 192 x 12.5 | 128 x 128 x 14 | 256 x 128 x 14.5 | 160 x 160 x 15 | 320 x 160 x 14.5 |
| Panel resolution | 32 x 32 (1024 dots) | 32 x 32 (1024 dots) | 64 x 32 (2048 dots) | 64 x 64 (4096 dots) | 128 x 64 (8,192 dots) |
| Physical LED pitch (mm) | 6 | 4 | 4 | 2.5 | 2.5 |
| Physical density (dots/m²) | 27556 | 62500 | 62500 | 160000 | 160000 |
| Panel weight (kg) | 0.24 | 0.13 | 0.23 | 0.24 | 0.37 |
| Viewing angle (horizontal) | ≥160° | ≥160° | ≥160° | ≥160° | |
| Viewing angle (vertical) | ≥160° | ≥160° | ≥160° | ≥160° | |
| Maximum power (w) | ≤12 | ≤20 | ≤20 | ≤18 | |
| Luminance (cd/m) | ≥1300 | ≥1000 |
≥1000 |
≥1000 | |
| Photos of backs of panels | link | link | link | link | link |
- 5V regulated power input, 4A max (all LEDs on)
- 5V data logic level input
- Displays are 'chainable' - connect one output to the next input.
Resources
Check out these tutorials for instructions, schematics, wiring diagrams and code examples!
- Getting Started with Interstate 75
-
RGB Matrix Shield for Arduino tutorial (32x32 only)
-
RGB Matrix + Real Time Clock HAT for Raspberry Pi tutorial
-
RGB Matrix Bonnet for Raspberry Pi tutorial
-
RGB Matrix FeatherWings tutorial
-
RGB LED Matrices with CircuitPython
Notes
- For 64x64 displays: You must solder bridge the E jumper on the back of the Adafruit Matrix Bonnet to 8, otherwise only half of your 64x64 display will light up.
- These panels are remainder stock from factories that make huge light boards. This means panels may vary slightly from batch to batch (though basic operation is the same). As such, if you're planning on chaining multiple boards we'd recommend buying them at the same time to ensure compatibility.
- Recent batches of these panels use a newer FM6126A driver chip - if you're having trouble getting them to light up you might need to specify this. If you're using the rpi-rgb-led-matrix library try running the examples with
--led-panel-type=FM6126A, or with our Interstate 75 examples you can specify the panel type like so:i75 = Interstate75(display=Interstate75.DISPLAY_INTERSTATE75_64X64, panel_type=Interstate75.PANEL_FM6126A)
-
32x32 6mm pitch
COM-B006£15.00 -
32x32 4mm pitch
COM-B007£20.00 -
32x64 4mm pitch
COM-B013£37.50 -
64x64 2.5mm pitch
COM-B014£37.50 -
128x64 2.5mm pitch (pack of 2)
COM-B021Out of stock£50.00
Add a LED matrix driver board
Smarts to drive your panels!
-
 Adafruit Matrix Portal - CircuitPython Powered Internet Display+ £20.50

Shop with confidence – we've been serving the hobbyist electronics, Maker, and retro gaming communities since 2012.
- Satisfaction or refund guarantee
- Worldwide shipping via mail or courier
- 57,000+ customer reviews
- Secure website and payments