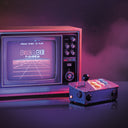
Picade Console
by Pimoroni


Power-up your TV with Picade Console! It's a compact, Raspberry Pi-powered retro games machine with authentic arcade controls that plugs right into your TV, monitor, or other HDMI display.
Picade Console is fight stick-style arcade console that riffs off our larger Picade with the same retro feel, same joystick and buttons, dedicated power button, and driven by the same powerful combo of the Raspberry Pi and Picade X HAT USB-C. It's beautifully packaged, comes with stickers and a neon-infused A3 Picade Console poster, and full assembly instructions.
It comes in kit form and takes an hour or two to build. The enclosure is made from powder-coated MDF and acrylic, giving it an authentic arcade look and feel. All you'll need to add is a Raspberry Pi, USB-C power supply,* HDMI cable, and micro-SD card.
*TV not included! Using a CRT TV requires additional adaptors.
Features
- Compatible with Raspberry Pi 4
- Black, powder-coated panels
- Acrylic console with retro artwork
- Push-fit arcade buttons
- Joystick with black ball top
- Speaker (3W, 4Ω, 2.5" driver)
- Easy access with removable back panel
- Dedicated illuminated power button
- Grippy rubber feet
- Dimensions (assembled): 245x120x140mm
Picade X HAT USB-C features
- Easy DuPont connectors for buttons and joystick
- Push-fit speaker terminals
- I2S audio DAC with 3W amplifier (mono)
- USB-C powered
- Power management, power switch pins, and power button
- Dedicated Picade Plasma Button connector
- 4-way joystick inputs
- 6 player buttons
- 4 utility buttons
- Metal standoffs to hold your Picade X HAT USB-C securely
Extras
- Picade Console poster / assembly instructions
- Picade stickers
Compact retro gaming
Picade Console is more compact and easier to build, but has a bunch of features liked a dedicated power button, better cable routing out the back of the console with a panel-mount USB-C connector for power, and retro-themed artwork.
Picade X HAT USB-C is packed full of useful features. We use simple DuPont connectors that just push in rather than fiddly screw terminals, and the speaker terminals are easy push-fit connectors.
There's dedicated power management on-board Picade X HAT USB-C; just plug your USB-C power supply into the back of Picade Console and it'll power your Pi through the Picade X HAT USB-C. The power button connected to the HAT means that once your Pi is safely shutdown, the power will be cut completely to the Pi. A simple press of the power button will boot your Picade Console up again.
Software setup
We recommend the RetroPie operating system for your Picade. You can download it from the RetroPie website and then burn it to a micro-SD card with Etcher.
Connect a USB keyboard to your Pi, and connect to Wi-Fi in the RetroPie menu. Press F4 to exit to the terminal and then type curl https://get.pimoroni.com/picadehat | bash to run the Picade HAT installer.
Reboot your Pi, if it doesn't prompt you to. Press the "Alt" key on your keyboard and then select "Configure input" to configure your Picade Console's controls. You'll find that the sound and power button should both be working now too!
Notes
- The USB-C panel mount cable that we include in this kit won't work with high powered USB-C power supplies that support power delivery or fast charging (such as the official Pi 5 one). We'd recommend using this universal PSU or a Pi 4 supply to power Picade Console. Alternatively, instead of using the panel mount cable, you could plug the USB-C connector from your power supply into the Picade X HAT directly, through the hole in the cabinet.
We no longer stock this product
It's sad to say goodbye but sometimes we have to retire products to make way for new things.
Need a large quantity or a customised version? We may be able to help! Contact wholesale@pimoroni.com to discuss a custom build.
Shop with confidence – we've been serving the hobbyist electronics, Maker, and retro gaming communities since 2012.
- Satisfaction or refund guarantee
- Worldwide shipping via mail or courier
- 57,000+ customer reviews
- Secure website and payments
