Inventor HAT Mini
by Pimoroni


A versatile motor, servo and audio driver HAT for Raspberry Pi. Bring your mechanical inventions, creations and contraptions to life! 🦾
Inventor HAT Mini helps transform a Raspberry Pi computer into a robot, prop, kinetic sculpture, creepy automaton or other exciting moving thing. Want to drive a couple of fancy motors with encoders (or hook up standard motors with jumper wires)? Yep! Add up to four servos? Sure? Attach a little speaker so you can make noise? No problem!
It's expandable too, with a pass-through header for stacking with other boards and four extra ADC-capable GPIO pins - you could use these to attach analog or digital sensors, or more buttons and LEDs. Speaking of LEDs, we've also managed to fit in 8 addressable RGB LEDs (AKA Neopixels) 🌈 - that's one for each servo and GPIO/ADC channel so you can use them as indicators.
We wanted Inventor HAT Mini to be fast and easy to get started with, so we've equipped it with convenient pre-soldered pin headers, a Qw/ST connector for plugging in breakouts and a fully featured Python library with plenty of helpful examples. For power users, we've added an unpopulated external power input and the ability to use higher voltage motors and servos (up to 10V). Scroll down for more details ⬇️
Features
- Nuvoton microcontroller (MS51TC0AE) with built-in 16-bit PWM and 12-bit Analog to Digital Converter (datasheet)
- 4 sets of header pins for connecting 3 pin hobby servos
- 4 sets of header pins for GPIO (all of which are ADC capable)
- Servo and GPIO pins all have their own power and ground pins
- Dual H-Bridge motor driver (DRV8833)
- 2 JST-SH connectors (6 pin) for attaching motors with encoders
- Alternate socket connector for attaching 2 standard (2 pin) motors
- Per motor current limiting (425mA)
- Per motor direction indicator LEDs
- MAX98357 3.2W I2S mono amplifier
- 2 pin (Picoblade-compatible) connector for attaching speaker
- 8 x addressable RGB LEDs/Neopixels (Note: currently not supported on Raspberry Pi 5!)
- User button
- Qw/ST connector for attaching breakouts
- Pass-through 40 pin header
- Fully assembled - no soldering required
-
Python library
- Schematic
Inventor HAT Mini is compatible with all Raspberry Pi computers with a 40 pin header attached. Mini HATs fit especially neatly on top of Raspberry Pi Zero boards, though.
Raspberry Pi, motors, servos and speakers are sold separately.
Fun with Nuvoton
A Nuvoton microcontroller handles the nitty gritty of driving the hardware accurately behind the scenes, we also use it for analog to digital conversion and as a handy I/O expander.
Because most of the Inventor HAT Mini functions are connected to this microcontroller, this HAT only uses a handful of pins on your Pi. With that in mind, we've used a pass-through header so you can stack it easily with other HATs and components that need access to the GPIO.
Connecting Breakouts
The Qw/ST connector makes it super easy to connect up Qwiic or STEMMA QT breakouts. If your breakout has a QW/ST connector on board, you can plug it straight in with a JST-SH to JST-SH cable.
Breakout Garden breakouts that don't have a Qw/ST connector can be connected using a JST-SH to JST-SH cable plus a Qw/ST to Breakout Garden adaptor. Want to use multiple Qw/ST breakouts at the same time? Try this adaptor!
Notes
- Measurements: 65mm x 30.5mm x 15.5mm (L x W x H, approx).
- Inventor HAT Mini has some extra broken out headers that adventurous roboticists might find useful (note that these are unpopulated and so will require soldering):
- 1 set of headers for connecting a serial device, or an 3.3V ultrasonic distance sensor
- Unpopulated terminals for supplying external power via a screw terminal block (10A max)
- 1 set of headers for connecting a serial device, or an 3.3V ultrasonic distance sensor
- External 5V power can be used to power your Pi and all the functions on the HAT (instead of the Pi's USB input). On an unmodified board you should only have one power source connected at a time, to avoid back-powering the second PSU.
- Alternatively, you can provide your motors and servos with a separate power supply from that used to power the Pi (input voltage 2.7V to 10V). To do this you'll need to cut the trace on the back of the HAT that is labelled with a lightning bolt. This will prevent the Pi being damaged by the increased voltage.
- The direction indicators for each motor can be disabled by cutting the traces on the back labelled with LED symbols, next to the motor connectors.
-
Inventor HAT Mini
PIM672£20.00
Useful add ons for this board...
Designed to work with Inventor HAT Mini these parts will make your project come to life!
-
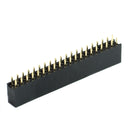 2x20 pin Female GPIO Header for Raspberry Pi+ £1.25
 -
 Micro Metal Gearmotor with Encoder (MMME)+ £8.25
 -
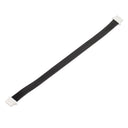 6 Pin JST-SH Cable+ £2.50
 -
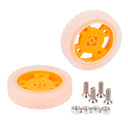 Narrow Moon Buggy Wheels - Pair+ £3.75
 -
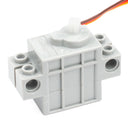
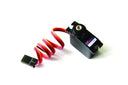 Digital Servo (DS-929MG)+ £8.00
 -
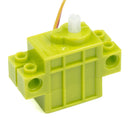 LEGO® Compatible Continuous Rotation Servo+ £5.00
 -
 LEGO® Compatible 270° Servo+ £5.00
 -
 LEGO® Compatible 360° Servo+ £5.50
 -
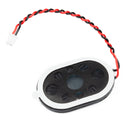 Adhesive Backed Mini Speaker 8Ω (1W)+ £1.50


Shop with confidence – we've been serving the hobbyist electronics, Maker, and retro gaming communities since 2012.
- Satisfaction or refund guarantee
- Worldwide shipping via mail or courier
- 58,000+ customer reviews
- Secure website and payments
