Fan SHIM for Raspberry Pi
by Pimoroni


Make your Raspberry Pi 4 seriously cool with Fan SHIM! This 30mm no-solder, controllable CPU fan with RGB LED and tactile switch will give your Raspberry Pi significantly better thermal performance. It's whisper-quiet too!
Fan SHIM uses a friction-fit header, so it just slips onto your Pi's pins and it's ready to go, no soldering required! Note that, due to the height of the fan, if you want to use HATs or pHATs with Fan SHIM, then you'll need to use a booster header.
![]()
Thermal images of Raspberry Pi 4 with and without FanSHIM installed. Images by Gareth Halfacree - check out his full benchmark blog post.
The fan can be controlled in software, so you can do crafty things like toggle it on when the CPU reaches a certain temperature. Use the LED as a handy visual indicator to show fan status, CPU load/temperature, whatever! The tactile switch can also be programmed, so you can use it to toggle the fan on or off, or to switch between temperature-triggered or manual mode.
You can read some detailed benchmarking of Fan SHIM's cooling performance here on the Pimoroni blog.
Oh, and it's compatible with our new Pibow Coupé 4 case for Raspberry Pi 4!
Features
- 30mm 5V DC fan
- 4,200 RPM
- 0.05 m3/min air flow
- 18.6 dB acoustic noise (whisper-quiet)
- Friction-fit header*
- RGB LED (APA102)
- Tactile switch
- Basic assembly required
- Compatible with Raspberry Pi 4 (and 3 B+, 3 A+)
- Python library and daemon
- Pinout
- Dimensional drawing
* Note that variation in manufacturing tolerances on both headers and boards can affect the tightness of the friction fit. If you find that yours is not making a good connection, you could try bending the two rows of GPIO pins away from each other very slightly to improve the fit.
Soldering the SHIM (either to the Pi's GPIO directly, or to a socket header) will provide the most robust connection.
Kit contains
- Fan SHIM PCB
- 30mm 5V DC fan with JST connector
- M2.5 nuts and bolts
Assembly
Assembly is really easy, and will take less than two minutes.
- With the component side of the PCB facing upwards, push the two M2.5 bolts through the holes from below, then screw on the first pair of nuts to secure them and act as spacers.
- Push the fan's mounting holes down onto the bolts, with the cable side of the fan downwards (as pictured) and the text on the fan upwards. Attach with another two nuts.
- Push the fan's JST connector into the socket on Fan SHIM.
Software
Our Python library lets you control the fan (on/off), RGB LED, and switch. There's a handful of examples to show you how to use each feature, and a script to install a daemon (a service that runs in the background) that runs the fan in automatic mode, triggering it on or off when the CPU reaches a threshold temperature, with a manual override via the tactile switch.
GitHub user "jane-t" has made a really useful LibreElec add-on to enable CPU temperature-based control of Fan SHIM: https://github.com/jane-t/rpi-fanshim
Tutorial
You can read our Getting Started with Fan SHIM tutorial for a really detailed guide on assembling Fan SHIM and installing the software, with photos for each step of the assembly.
Notes
- When mounting or detaching the fan, or assembled Fan SHIM, do not push on the fan itself, as it is liable to break.
- Be careful to mount your Fan SHIM on the correct pins on your Pi, with the Pi shut down and power disconnected. Shifting it left by one pin or down a full row of pins could cause damage to both the Fan SHIM and the Pi. Check out the photos in our tutorial if you're not sure.
- Not heatsink-compatible!
- Because Fan SHIM uses pin BCM18 to control the fan, and this pin is also used by I2S audio devices, you won't be able to use I2S DACs like pHAT DAC, pHAT BEAT, and the IQAudio boards at the same time as Fan SHIM
- Dimensions: 45x39x11mm
- If you're using it with Ubuntu, the fan control won't work as it uses the serial pins which are enabled at boot by default. To disable these and allow the shim to work add enable_uart=0 to system-boot/usercfg.txt.
-
Fan SHIM for Raspberry Pi
PIM46135% off!£6.50was £10.00
Protect your Pi!
Fan SHIM is compatible with our Pibow range of cases.
-
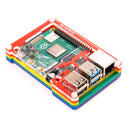 Pibow Coupé 4 – Rainbow+ £5.80
 -
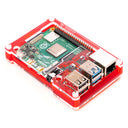 Pibow Coupé 4 – Red+ £5.80
 -
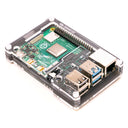 Pibow Coupé 4 – Ninja+ £5.80
 -
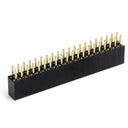 Raspberry Pi GPIO Booster Header+ £1.05


Shop with confidence – we've been serving the hobbyist electronics, Maker, and retro gaming communities since 2012.
- Satisfaction or refund guarantee
- Worldwide shipping via mail or courier
- 58,000+ customer reviews
- Secure website and payments