Trackball Breakout
by Pimoroni


A tiny, RGBW-illuminated, clickable Trackball Breakout that's perfect for adding navigation or control to your Raspberry Pi or Raspberry Pi Pico projects.
We've taken a trackball module from everyone's favourite fruit-flavoured phone and added a bunch of clever engineering to let you build old-school interaction into your projects. As well as x/y directional tracking and click, we've added an RGBW (red/green/blue/white) LED right under the clear trackball to illuminate it and allow you to add visual feedback.
Use Trackball Breakout with an Arduino that supports USB HID to use it as a tiny mouse. Or why not use it as a colour/brightness control for an LED matrix breakout, or a navigation controller for a Cosmic Unicorn?
Because the trackball has a grippy rubber surface you can also use it with the trackball facing downwards and track it as it rolls on a surface, like a traditional roller ball mouse.
It's compatible with our fancy Breakout Garden system, where using breakouts is as easy just popping it into one of the six slots and starting to grow your project, create, and code. Trackball breakouts made after April 2024 are also Qw/ST compatible so they can be plugged into a whole range of different microcontrollers and HATs with Qwiic or STEMMA QT connectors.
Features
- Mini trackball with click button
- RGBW LEDs beneath trackball for illumination
- Moulded plastic trackball casing
- Mounting holes
-
Nuvoton MS51XB9AE MCU
- I2C interface (address 0x0A/0x0B (cut trace))
- Qwiic/STEMMA QT connector
- 3.3V or 5V compatible
- Reverse polarity protection
- Compatible with Arduino
- Compatible with Raspberry Pi computers (Python library)
- Compatible with Raspberry Pi Pico (C++/MicroPython libraries)
Kit includes
- Trackball breakout
- 1x5 pin header
- 1x5 right-angle socket header
We've designed this breakout board so that you can solder on the piece of right angle female header and pop it straight onto the bottom left 5 pins on your Raspberry Pi's GPIO header (pins 1, 3, 5, 7, 9).
Engineering
There's a remarkable amount of engineering packed into this diminutive breakout.
The trackball module itself has a tiny cylinder magnet at each corner that spins and is read by one of four Hall-effect sensors.
There's a tiny dome switch right under the trackball for detecting clicks, and four LEDs (red, green, blue, white) around the trackball to illuminate it.
We've designed and injection-moulded a plastic trackball casing to hold the module in place and protect it, and this can be popped off to clean the trackball or roller, or to replace the module if necessary.
There's an on-board Nuvoton MS51XB9AE MCU to read output from the trackball and dome switch, to control the LEDs, and to implement I2C.
Software
We've put together a Python library for Trackball Breakout that makes it simple to read directional values, click events, and set the LED colour. There's a handful of examples of how to read the direction and click, make the LEDs rainbow, and use it as a mouse in Raspberry Pi OS.
You can also use this breakout with Raspberry Pi Pico and other RP2040 boards, using C++ or Pirate brand MicroPython.
Notes
- The trackball breakout only works reliably with I2C speeds up to 250kHz due to limitations in the Raspberry Pi's clock-stretching implementation.
- Dimensions (click for image): 25x22x11mm
- Older versions of this breakout use a Nuvoton N76E003AQ20 MCU.
-
Trackball Breakout
PIM447Out of stock£12.75
Qw/ST cables
Connect breakouts to boards compatible with Qwiic & STEMMA QT
-
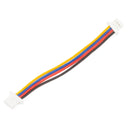 4 Pin JST-SH Cable (Qwiic, STEMMA QT, Qw/ST)+ £1.25

Breakout Garden
The easiest way to use breakouts with Raspberry Pi & Pico
-
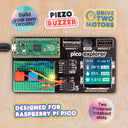 Pico Explorer Base+ £20.75
 -
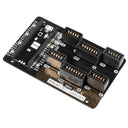 Pico Breakout Garden Base+ £11.00


Shop with confidence – we've been serving the hobbyist electronics, Maker, and retro gaming communities since 2012.
- Satisfaction or refund guarantee
- Worldwide shipping via mail or courier
- 58,000+ customer reviews
- Secure website and payments